What Makes a Good Concept Drawing?
6 Helpful Tips to Communicate Your Vision to a Patternmaker
Every new product idea starts with an illustration, whether that’s a rough sketch with a pencil on paper, a sharpie on a napkin, or a basic outline using software. It doesn’t matter how you bring your concept to life; what matters is that you have something visual.
As someone looking to bring a garment or product idea to life, you might feel intimidated by the need to create concept drawings. Let me put your mind at ease: your sketches don't need to be gallery-worthy masterpieces. You could even take an image of a similar product and alter it to fit your idea. The part that matters most is being able to share your vision instead of describing it so that your product development consultant (that’s me!) understands your idea.
The following six helpful tips will inspire you to sit down and finally create that concept drawing you thought you weren’t skilled enough to create.
Tip #1: Include the Human Form
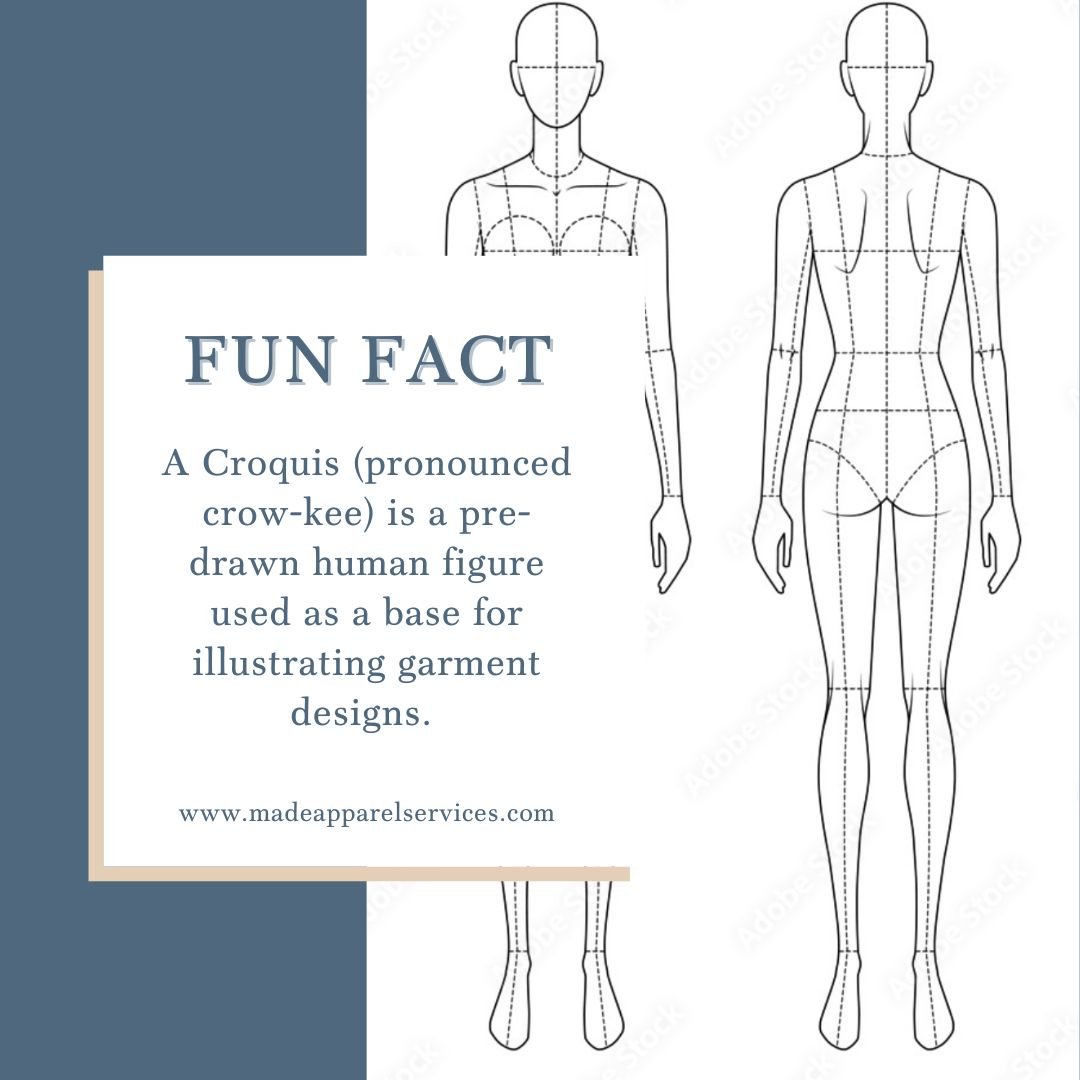
Start by sketching your design on a human figure. Usually this is done through the use of a croquis (an outline of the human form as pictured in the image below). Using the human form provides context and helps a patternmaker visualize how your garment should look when worn.
Alternatively, you can find an image of a garment similar to your design vision on the internet. Just make sure it’s being worn and not flat on a hanger or table.
You can also take pictures of something you already own. Again, just make sure someone is wearing it before you snap the shot!
This crucial step helps both you and your consultant understand how the garment proportions relate to the body along with the scale of things like pockets and sleeve length.
Tip #2: Don't Skip the Seams
When drawing your concept, make sure to indicate where you envision the seams will go. These lines are like a roadmap for your designer, showing how you imagine the garment coming together. Even rough lines can convey important information about the construction you're envisioning. Don’t worry about getting it perfect. Your product consultant will tell you if the seam placement needs improvement or adjustments.
Tip #3: Consider Function
Make sure to address the practical aspects of your design by considering and indicating how someone would get in and out of the garment or interact with the product. For example, is there a zipper? Buttons? Elastic? These details might seem mundane, but they're essential for turning your vision into a wearable piece or usable product.
Tip #4: Think About Movement
For garments, consider how they will be used. Will someone need to reach overhead while wearing it? Bend down? Dance? Include notes about movement requirements directly on your sketch. This information helps your consultant recommend the appropriate materials and construction methods.
Tip #5: Embrace the Imperfect
Just remember, your concept drawing is a communication tool, not a work of art. Don't let perfectionism hold you back. Rough sketches with clear notes are often more useful than polished drawings that lack important details.
Tip #6: Take it Beyond Paper
Here's a tip from the pros that can really elevate your concept: buy some fabric, or frankenstein a current garment to create a rough prototype. Use a stapler, duct tape, pins, glue, anything you want as long as it motivates you to unleash your creative side. A physical reference sample helps your designer understand your vision in a tangible way. It's an invaluable tool for conveying texture, drape, and overall feel.
Concepting Reveals Your Thought Process
You're helping your design consultant step into your creative mindset by providing visual and physical references. Don't feel self-conscious about sharing rough work—patternmakers are used to working with concepts in various stages of development. Your willingness to share your thought process, even if it feels unpolished, gives us the insight we need to bring your vision to life.
Remember, the goal of a concept drawing isn't to create a showcase—it's to communicate your ideas effectively and start a conversation. Focus on including the essential details that will help your consultant understand your vision, and don't be afraid to supplement your drawings with notes, fabric samples, and rough prototypes. This combination of elements will create the best possible foundation for turning your concept into a prototype.
Listen to Our Concept to Customer 4-Part Podcast Series
We kick off our Concept to Customer series by diving into the first step: designing concept boards. Heather explains how these boards help communicate design ideas effectively and shares five simple steps to create one: choosing a platform, selecting a reference garment, noting desired changes, organizing details, and printing the final design. Listen to Part One Here.
All Product Development Starts with an Illustration
Design Concepting Course
If you’re still struggling with illustrating your design, our Design Concepting Course might be a perfect ‘fit’ for you!


